Thursday, May 31, 2012

Summer Sardine Sandwich and a Grilled Corn and Black Bean Salad

 
When it comes to wild-caught fish that sport those ever so famous fats that support brain, eye, and cardiovascular health, yes...they really could be the kings of fat when it comes to us humans...DHA and EPA as we have named them, sardines don't usually make the list of entree worthy fishies.  That's right, we usually think of sardines as the poor little guys who give their precious fat up to a little gelatin capsules that we can swallow in order to reap the benefits of the fabulous fats without having to really "eat" anything at all.  Anyway....I love tuna salad, but the more briny fishiness of sardines combined with some fresh garlic and red onion, the juice of a lime, and a little olive oil I thought would make for a sandwich spread that would have so much flavor when paired with some crustily toasty bread that I had to make it a reality.  That's when I woke up in the middle of the canned meat aisle at the grocery in a puddle of my own drool and realized that it was almost time for dinner.  OK, so I got to the house and mixed up 8 sardine fillets with a small clove of garlic, a quarter of a red onion chopped finely, I squirted some lime juice up in the mix and added some Dijon mustard and black pepper.  For just a tad of sweetness and extra flavor I added several tablespoons of pineapple juice and mixed it all up and threw it in the fridge for the flavors to come together.  


So in the meantime, seeing that it is pretty much summer...it's time to take some stuff to the grill.  I decided to blog an awesome roasted corn and bean salad.  This is a really easy little something to make that provides a load of veggies and complimentary amino acids with corn and black beans contributing their proteins to the mix.  So, I grilled some corn, tomatoes, and green pepper first.

To complete the roasted corn and black bean salad, I trimmed the corn off of the cobs and I peeled the tomato and pepper skins away from the meat of them both.  I gave a rough chop to the pepper and tomatoes and threw all of this in a bowl with two cans of black beans.  I'm usually a big fan of soaking beans for 24 hours and then cooking them on the stove, but guess what....tonight I bought two cans from the grocery.


  I chopped the rest of that red onion from before, threw it in the mix, and then drizzled a little olive oil over that with the juice of a lime, some salt, pepper, cumin, and chili powder and tossed it all up and called it done.  So, I got my sardine spread out and gave it a taste - craziness - salty and sweet with the hints of raw garlic and onion throughout but balanced by the pineapple that came through subtly.  I just needed two crunchy slices of bread and some lettuce and mater to bring this intriguing little sandwich to life.  I'm glad I did, and I hope my brain, eyes, and little arteries are glad too for getting them lots of little DHA and EPA to feast on.  By the way, I used Udi's gluten free whole grain bread. 

Don't think you can do sardines?  I'm willing to bet this would be good with canned tuna or salmon also.

Monday, May 21, 2012

Whoa, has it been too long to post about some potatoes?

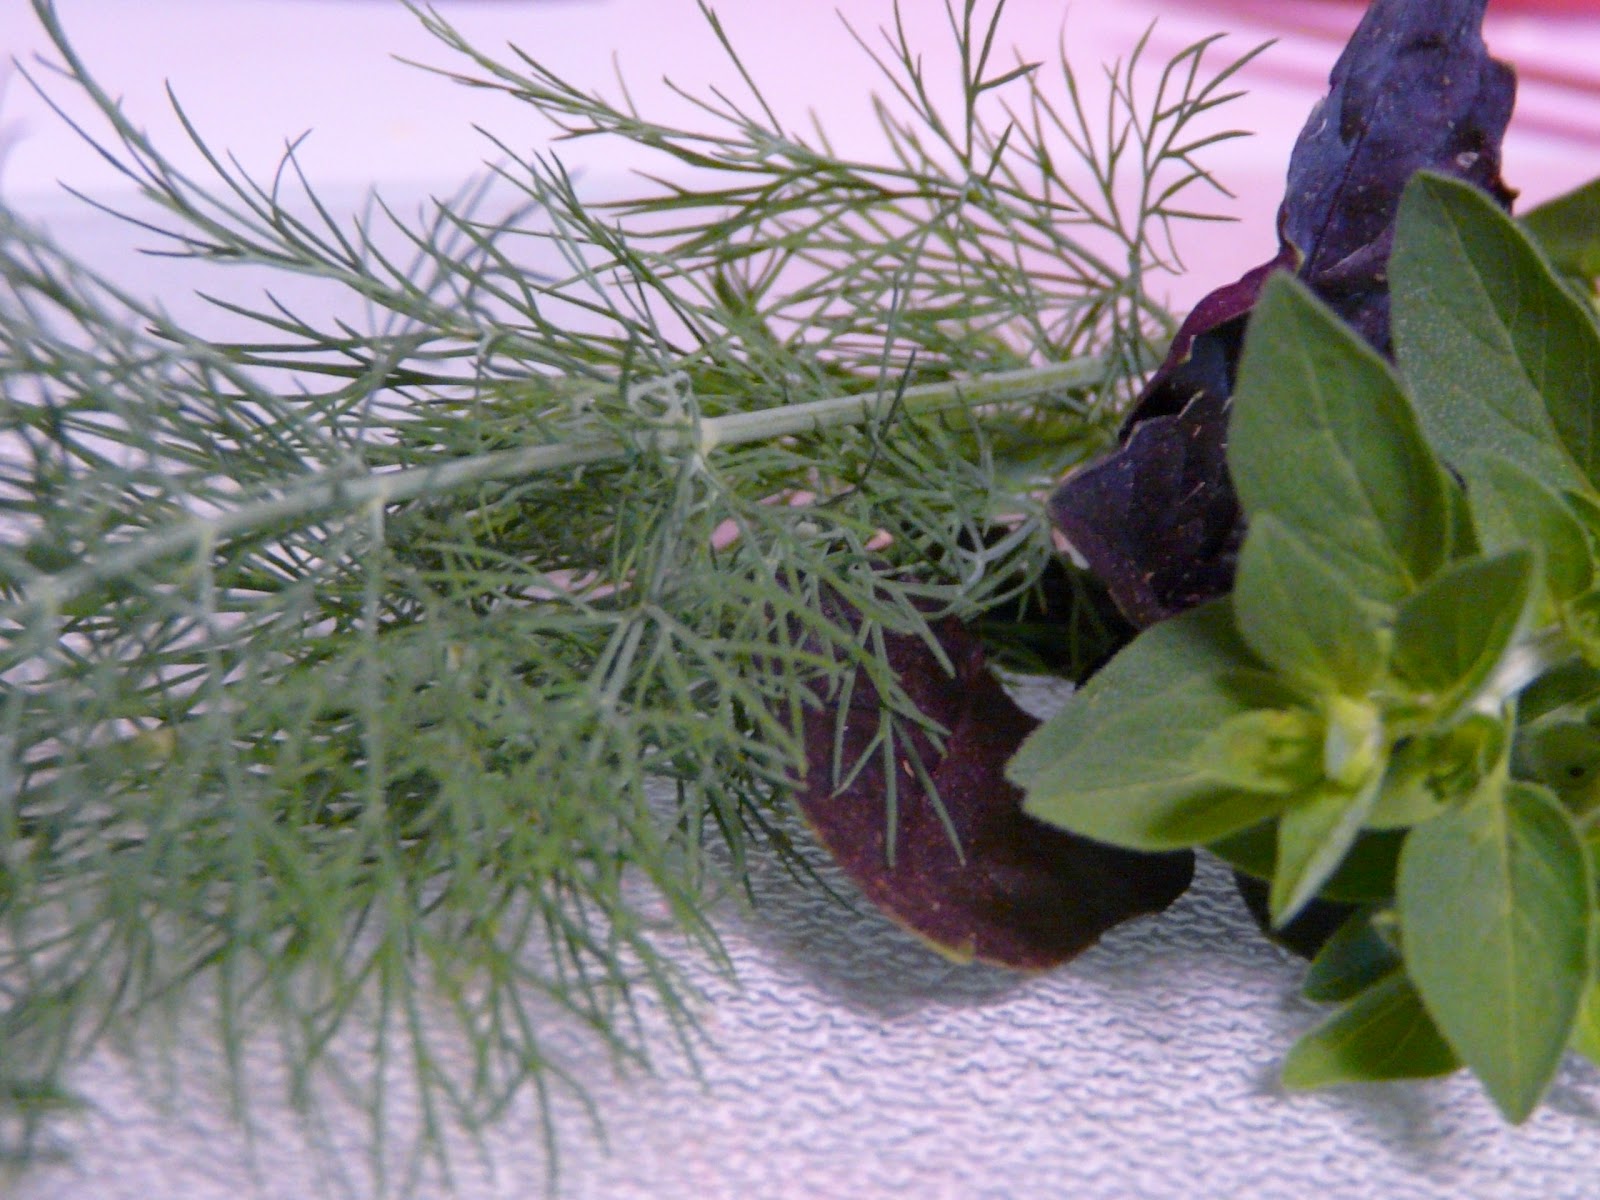
So, it's been a long time and I didn't realize how much I missed the simple act of sitting here and writing about the most exciting part of our days...eating good food.  As I have looked back through this blog with time to reflect on how the ways my own eating habits have changed and cycled, I have watched as I have come full circle, squarely landing on whole foods with plants as the star center.  I think it's easy to over-think our diets today as our options for food have expanded way way way beyond what would be available to scavenge from the woods, and disease and the media have stretched our perceptions about how almost every food can kill us and how every food can heal us...the dilemma is bigger now than ever.  Stress takes over our lives and we forget how to enjoy the very wonderful and powerful pleasure of gently preparing whole ingredients in to a sensual experience that nourishes our bodies and minds and keeps us healthy for what may come...which is life, but in these times we are consuming foods that prepare us less and are we living lives that demand more.  OK, so enough of the little black letters that depending on what mood you're in might make sense or might sound like a bunch of rubbish...I am sorry to those who enjoy reading my posts since it has been so long, but that little thing called LIFE has really been taking a toll on me lately but I am proud to say that even though it's about 8 years late, I have graduated from Clemson University with a bachelor's degree in Food Science with a focus in dietetics...woohoo!!!  I have missed this blog and I regret not committing more time to keeping it fresh, so for that I will expand my horizons while always keeping it simple from now on.  I encourage anyone reading these posts to share with me your own experiences so that we can all learn about eating, living, gardening, and feeling well.  I'll kick it off with a fast and fresh recipe that is straight from the garden...Herb Roasted Taters with Oregano, Purple Basil, and Dill.
Alright, this happens to be my favorite way to eat potatoes.  I should have some red potatoes to harvest out in the garden, but I used some that I had in the kitchen this time.  However, my red basil, oregano, and dill are straight from the garden, and if I had a few goats or a dairy cow I might have made the yogurt too, but the Greek yogurt on the side here came from Trader Joe's and I'm pretty sure it is better than any yogurt I could make.
So, for these taters, all you need is a sprig or two of fresh herbs...you can pick whatever you like...chop them up fine, quarter about 6-8 small red potatoes, chop a glove of garlic, throw it all in a bowl with 2-3 tbsp extra virgin olive oil and a couple pinches of salt and toss it all together until the herbs coat the potatoes.


  Throw them in a 400 degree preheated oven, skin side down until you can stick a toothpick through the taters with no effort.  Serve 'em up with a nice side of Greek yogurt for dipping and you have yourself a little pre-dinner pleaser that rocks!


Monday, January 30, 2012

Oh come on...y'all know how much I like to make soup...I try to limit soup posts...ok no I don't


At least this one is pretty darn unique.  We will call it the eye opener due to the fact that you may be able to cure night blindness just by eating one bowl...not really...probably two bowls though.  This is a slightly sweet but a little spicy (not in a hot way, but a tasty way) sweet potato and roasted butternut squash concoction with some beans, and to max it out in the end, just add a pat (or 6...I mean 2) of butter to your bowl and you can just feel those carotenes splittin' on up in to those retinols and being sucked right through your small intestinal walls....so the whole point here is that this soup has a few sources of vitamin A...I really hope you got that because....anyway, on to the soup.  For this spectacular soup you will need:
Ingredients:
One medium or large sweet potato cubed - leave the skin on or you're not cool
One medium butternut squash halved
2 medium yellow onions chopped or stringy however you like
5 cloves of garlic with medium chop
1 package of frozen lima beans
1 cup red lentils (oooooweeee yummy)
3 cups veggie stock
8 cups water
1 tbsp ground cumin
Salt and pepper
Extra virgin olive oil
If you are like me - a little bit of grass fed butter for your personal bowl (totally optional)
Preparation:
First thing...preheat the oven to about 375-400.  Throw those onions in a hot stock pot with about 3-4 tbsp olive oil and toss a pinch of salt over them.  Give them a little toss around and then throw that cumin over them and stir it up to let that cumin get nice and toasty.   As the onions start to get clear and soft, throw those cubed sweet potatoes in there and be careful not to drool in to the pot while you are smelling the nice toasty cumin.  Throw a little pepper in and toss the garlic in also.  Stir it all around a little bit, just enough to let the garlic get fragrant and then pour in the veggie stock and let that deglaze all of the good sticky cumin and onion residue off the bottom of the pot.  While that returns to heat, place the squash halves skin side down on a pan and throw them in the oven and leave them alone for about 45 minutes.   Let the mixture in the pot return to heat and then dump the frozen lima beans all up in the mix.  Toss a couple of pinches of salt in there, let it return to heat and then add all that water.  Get the whole mix up to boil and then smack a lid on it, turn down the heat and let it simmer while the squash gets soft in the oven.  After the squash is soft, take it out and scrape all of that soft orange flesh out in to a bowl and then add it all to the pot and stir it all up.  For the last step, about 20-25 minutes before you want to eat it or store it, throw in the lentils while it is still simmering.  They don't take long to cook and are done when they are yellow instead of orange.  All done - you may want to salt to taste, or add a little cayenne to your bowl for some extra kick, just be sure to taste along the way and make sure you let the lima beans and sweet taters get cooked all the way through and you are golden....or more of an orange color in this case.  See better tonight!


Gluten free as always


Fruit...veggies....protein...millet and flax......oh yeah and chocolate baby!! Today's lunch!!

A long day at school going to class, studying for tests, working on projects and waiting around for this semester's first community gardening meeting calls for one thing....the Bento Box.  That's right....it's a today's lunch post.  I just have to be extremely careful because I am on Clemson campus with a box that has almonds and peanuts in it...very dangerous situation here at Clemson due to the squirrel intelligence agency.  These nuts will have to be contained behind closed doors today.  OK......so for lunch today we have a New Zealand grass fed sharp cheddar cheese sandwich on toasted millet and flax bread with some nice baby greens and some cracked peppercorns - which is some kind of speak for what we call pepper where I come from, but the sandwich sounds so much more "bistro" when I say cracked peppercorns, but let's face it...ain't nothin' bistro about this sandwich that was tossed together in about 2.634 minutes this morning while I tried to keep my dog from eating the over easy egg I had just made for breakfast.  In addition to the cracked peppercorn and cheese sandwich, we have a delightful carrot, dried figs, roasted peanuts, some raw almonds, and if you look very closely through the dark shadows of the snug little compartments of my lovely little lunch labyrinth you might just spy a small piece of chocolate lying in wait to melt in my mouth and deliver all of its yummy, bitter, 85% cocoa, short and medium chain fatty acids in to my bloodstream.  While you think that was a dramatic and ridiculous....borderline insane way of describing the smallest item in my box, think again and look it up.  There is a lot we don't know about fat....and then there is much we do know.  Try to love yourself more today and put some things in your body (through your mouth of course) that your body might just thank you for in ways that make your brain say nice things to you.  

Gluten free as always

Monday, January 23, 2012

Spaghetti Squash Staple


Here is a must have side for your arsenal of quick and tasties that can go along with pretty much anything.  I was in the grocery trying to pick up a few things to cook Sunday night dinner at my parents' and I noticed how nice and yellow the winter squash were so I picked one up.  The bulk portobella mushrooms looked darn good too so I grabbed a couple of those and I was off.  If you don't have an onion, garlic, a block of parmesan, a little olive oil and some butter lying around the house then you may want to grab those staple items also.  This side dish is quick and easy, but so good that if you're not cooking for four, you'll be dreaming all night about how you get to eat it again for lunch the next day (or maybe even breakfast).  Spaghetti squash is so called because after you cook it up, you can scrape the flesh out with a fork and it comes out in strands that are so similar to spaghetti noodles it is quite scary - it's like a little spaghetti noodle making machine.  If you're being carbohydrate conscious, or just trying to eat more veggies as we all probably should, then the spaghetti squash is a great alternative to pasta - you can even save the seeds and roast them up for a snack later.  For the spaghetti squash and mushroom side dish you will need:
Ingredients:
1 heavy, yellow spaghetti squash (they're the oblong, round, yellow ones)
2 large portobella mushroom caps sliced
1 medium yellow onion chopped
3 large cloves garlic chopped fine or minced
Extra virgin olive oil
Parmesan cheese
2 Tbsp butter (optional)
Salt and pepper
Preparation:
Get a pot of water (big enough to hold the squash) boiling.  You can throw in a generous portion of salt so that while the squash is cooking it takes up a little of that salty flavor.  Cut the squash in half longways - be careful cause these things don't just cut in two like a summer squash.  Lay the two halves in the boiling water and let them boil while you get over to the rest of the ingredients.  In a large skillet, heat up about 4 tbsp olive oil.  Don't do like I did and stick your finger in the oil to see if it is hot because that will burn your finger and it will hurt - it's hot when it just starts to give off a little smoke.  Throw your chopped onions in now and throw a small little pinch of salt on 'em.  As the onions are getting soft, you can slice up your mushrooms and check on your squash or if you're like me you can cut off a little pat of butter and eat it while no one is really looking.  Seriously though, make sure your mushrooms and garlic are ready before the onions start to get that nice little brown coloration - and when the onions are soft and slightly browned, throw the mushrooms in the skillet toss a half pinch of salt over 'em and let them get soft.  I always see on tv where they never wash the mushrooms or salt them because supposedly it changes the texture and all this mess, so if I am cooking them, I don't wash them - just thought I would throw that out there, but I did give them that little pinch of salt.  After the 'shrooms get dark and soft, toss in the garlic and give everyone a little stir around - if it's dry in there you can add a little more oil.  At this point, the squash should be done.  It will be soft to the prick of a fork.  Take the halves out and rake the flesh with a fork and watch the magic.  Dump all of the "spaghetti" in to the skillet with the 'shrooms and onions and garlic and mix it all up.  This is where I add the butter - if you're trying to avoid saturated fat or you don't like butter for some horrible reason then you can just add a little more oil or just don't add anything.  Grate a little Parmesan on top of the whole mess and you've got a side that might just take over the whole meal and decide that it is not a side anymore and that it is not going to take any abuse from anybody and it will now name itself the star of the plate......so yeah, it's pretty good.  Salt and pepper to your liking.  By the way, a piece of baked wild salmon and a nice green salad goes really well with this one.  Enjoy!!

As Always, Gluten Free

Saturday, August 13, 2011

A Tale of Two Stews


Yeah, I know it's not Winter - I like stews throughout the year because for me, throwing several really good ingredients in to a pot, stirring it all up and simmering it down is magic.  The smells that waft through the kitchen are amazing and watching the bubbling little concoctions evolve in to something that is so much more than the sum of its parts is where it's at.  One last thing is that I can always throw some in the canner and have some rockin' stuff to eat when it is Winter again.  First one is kind of like a thin oyster chowder som'n erother.  
Ingredients:
How ever many live oysters you feel like shuckin' - I used 12 and wished I'd had a lot more cause they were small - you could use canned oysters
1 cup raw milk
2 cups water
1 cup fresh okra (or frozen) chopped
1 medium yellow onion diced
2 medium red potatoes cubed
Salt
Cayenne pepper
About 10 shrimp frozen thawed or fresh peeled and deveined
Off the cob fresh corn - about 2 ears or half a can 
4 stalks celery chopped to suit your own liking
Preparation:
OK, this is enough stuff to make a small pot of stew enough for two people to eat on for a couple of meals.  Get a stock pot and put your milk, water, potatoes, onion, okra, corn, and celery in and get the heat going medium to high.  While this is heatin' up chop your oysters and shrimp or leave 'em whole - whatever.  As the mixture comes to a low boil give it a stir and turn it down to simmer.  While it's simmering season it with a little salt and cayenne if you like - take some time to maybe try out some other spices. I kept this one simple.  Give the stew some time to simmer down and lose some of that water, stirring often.  When the potatoes are soft and you've got a really low simmer goin' on, throw those oysters and shrimp in until the shrimp turn pink and you've got stew number one - let it simmer for an hour or so and you've got super stew number one - put it in a glass container and in the fridge for a day and you've got the ultimate stew number one - I am so corny it is painful - let's move on to stew two after a nice pic of the first.


I won't say that this one is way different than the first one as far as ingredients go anyway, but the taste is way different.  This second stew is a sort of real comforting and thick type of stew with a critical last step big event that I'll keep you on the edge of your seat for the rest of this post and you'll be biting your fingernails and...OK that was stupid, the last step is just to add about 2 tbsp butter and stir it in to the simmering pot which just sets this stuff up and gives it some sort of special powers I think...anyway...
Ingredients:
10 shrimp frozen thawed or fresh peeled and deveined
1/4 cup dry white Basmati rice
2 cloves chopped garlic
2 small to medium red potatoes cubed or diced
2 medium carrots diced
1/2 yellow or white onion chopped
2 stalks celery chopped
3-4 cups mixed baby greens or spinach whole (fresh)
2.5 cups water
2 tbsp butter 
Preparation:
Throw in the rice, taters, carrots, onion, celery, greens, garlic, and water in a small stock pot, give it all a good stir, throw on the lid and get the heat going medium to high.  Remember, there is rice in there so get it on up to boil.  While that is gettin' up to temp make sure your shrimp are prepped and ready, and have 2 tbsp butter on hand gettin' soft on the table top, but make sure that no one...or no dog sneaks by and grabs the fresh butter off the counter and swallows it down because I myself have been known to devour straight up butter and 2 tbsp ain't nothin'.  Some people tell me their dogs eat butter but I wouldn't know anything about that....OK, so when the stuff gets up to boil turn it down to low, get it all mixed up, season it with a little salt - maybe some oregano which I did and found it was a very nice addition, and put the lid back on and leave it alone for a little while.  Once the rice gets finished and the taters are soft, lay the shrimp in and put the lid back on.  When the shrimp are pink, you can pinch them and if they don't wake up then they are done...no that's another thing - if you pinch them and they are slightly firm but not rubbery then they're perfect and now for the BIG EVENT!!!  Put the butter in and stir until it is all melted throughout - make sure you have enough salt and there you have stew 2!!


The Basmati rice sort of disintegrates in to little pearls on this one which gives the whole thing a really cool texture, and who can resist the taste of Basmati rice and shrimp anyway?  Not me. Please check out my facebook albums for current pics of the garden - there is a lot going on this Summer and Fall and hopefully I can get some good recipes going that include everything I grow. Enjoy!!


As always, gluten free

Sunday, February 13, 2011

5 Star Veggie Tacos

No no no, don't get confused - this ain't no tofu taco recipe where I tell you to go out and buy some firm little square pieces of fermented soybeans so you can slap it on a corn shell and call it a taco.  No way.  This recipe actually stems from a breakfast that Mandy and I currently enjoy of quinoa, millet, and amaranth grains done up just like grits or oatmeal...but so much better, but there's more...these three grains are three of the only ones consistently listed as alkalizing on many of the "alkalizing foods" lists that you can find in books, on the internet, wherever you can find acid/alkaline balance information on foods.  Yeah, I told you that I was on an alkalizing kick, and now I will be for life...not because of all of the breathtaking evidence for it, but for the way I feel - I've never been better.  I didn't tell you that I have started letting my former enemy (grains) slip back up and make their way back in to my digestive tract.  Well, in this case, we had a little talk over breakfast one morning, and while I was telling them how disgusted I was with the sorry excuse for food that they were, the quinoa, millet, and amaranth leapt out of the cabinet and just so happened to fall in to my mouth - along with a little bit of butter...and some salt...OK OK, I shouldn't have to make excuses - so if you're going to get some whole grains in your diet, here are two excellent and perfectly tasty ways to do it.  It all started with breakfast when Mandy noticed the unique texture of the quinoa.  That is when she said "You know what?  This stuff would make awesome tacos if you seasoned it up like chili!"  That was that, and after tonight - I don't think we ever have to worry about not having a freakin' awesome taco again - here they are. (Look, don't give me a hard time about the corn - everyone deserves a real taco every now and then...or maybe once a week or so.)


For the tacos you will need:
Ingredients:
Organic taco shells (Trader Joe's - be sure they are corn only)
1/3 cup whole quinoa
1/3 cup whole amaranth
1/3 cup whole millet
1.5 cups veggie broth
1.5 cups water
1 white onion chopped
4 garlic cloves chopped fine
1 tbsp cumin
2 tbsp chili powder
1/2 teaspoon smoked paprika
1/2 teaspoon turmeric
1/2 teaspoon cayenne pepper (leave it out if you don't like the kick)
Iceberg lettuce (Mandy said so)
Sour cream
1 can diced tomatos
2 tbsp raw unfiltered apple cider vinegar
1 tsp cilantro fresh (dried parsley works too)
And the usual extra virgin olive oil and some sea salt

Alright, sorry...I didn't realize that the list was so long - stay with me cause it's so worth it.  You can do this part way ahead of time, it's just the salsa.  It's tough to find a salsa made with apple cider vinegar (let alone raw unfiltered), so I just improvised my own that turned out pretty good.  Just saute half of your white onion with about 2 cloves garlic until soft, pour the tomatoes over that and add the apple cider vinegar and cilantro - let it get hot and bubbly and then take it off the heat and chill it in the fridge - that'll make a decent salsa for topping the tacos or with chips.  Now we can start on the "chili".  Start by sauteing the rest of the onion and garlic in olive oil until soft.  Then add the veggie stock, water, cumin, chili powder, cayenne, paprika, turmeric, a few good pinches of salt, and all the grains.  Stir it all up, bring it to a boil and then put a lid on it and turn it on low heat to simmer until the grains take up all of the liquid and spices - about 20-25 minutes.  While the chili is going, get your lettuce chopped up, get the taco shells toasty in the oven, and get a couple spoons out for sour cream and salsa.  When your chili is finished, slap some in a shell, put down a nice portion of sour cream on that, layer on the lettuce, and drizzle on the salsa.  What you have there is the best veggie taco ever...you can thank Mandy.

OK, so really quickly - if you like your whole grains in the morning, take that 1 cup mixture of whole grains from above and just do 2 cups water for 1 cup grains, bring it to a boil and then put a lid on it and turn the heat down and let it simmer for about 15 minutes.  This makes an awesome replacement for corn grits or oatmeal.  Just stir in some butter and salt, maybe some milk, maybe some honey - hell, whatever you put in your grits and oatmeal.  It's organic unsalted butter and some sea salt for me...perfect.  Enjoy!!


As always, gluten free  (that's breakfast up there)

Sunday, February 6, 2011

Quinoa Breakfast Sliders

Inventing an interesting and tasty breakfast is not easy when you are gluten free, processed food free, sugars free (sugars free is not a typo, I say this to make a point that this is different from sugar free.  Sugars free means no sweetening sugars which right now even includes lactose - milk sugar) and blah, blah, blah free right?  Recently I have been on an acid alkaline balance kick, and it has become pretty obvious that many of us, including myself are mildly acidic or even severely acidic.  This stems from eating too many processed foods, sugar, meats, and grains.  However, not all grains are created equal, and although it seems ironic to be limiting grains to absolutely nothing in my diet and then come up with this breakfast, I challenge all to do a little research on Quinoa.  This grain goes way back and may be a smarter alternative to the beloved other grains that we all have been taught are so healthy these days.  But lets get on to the good stuff - breakfast!!


Thursday, February 3, 2011

The Word Savory....now makes me think of this....Roasted Garlic and Butternut Squash Puree Soup

After trying something new, have you ever wondered why you haven't been eating it all of your life?  I mean really, I'm sad because I ate the last little bit of this at lunch today.  I had never had butternut squash anything, ever, but if you ever watch any cooking shows or look through any winter recipe magazines, butternut squash seems to be a pretty popular ingredient and especially in soups.  Needless to say, I decided to give the butternut squash a spin.  I took a couple of different recipes, added my own ideas and twisted the others a little and came up with my own roasted garlic and butternut squash puree.  This one is at the top of my list for taste and ease of prep.

Ingredients: 
1 medium butternut squash
1 medium white onion
1 whole head of garlic
4 cups chicken stock
4 tbsp. organic butter
Salt, pepper, cayenne pepper, cumin, chili powder
Sour cream and chopped green onion for garnishing

Preparation:
Start out by chopping up the butternut in to large hunks, skins on but throw the seeds out. (Unless you want to toast them and sprinkle them on top of the soup - shoot! why didn't I think of that?)  Preheat the oven to 400 degrees.  Place the chunks in a large baking pan and add about 1.5 inches of water.  Wrap your garlic head up in tin foil and place that and the pan of squash in the oven for about an hour.  While that is roasting, saute the white onion in a pan with extra virgin olive oil or butter until the onion is soft.  Now, if you have any friends, call them up and tell them to stop by the store and grab some wine and come on over for soup, wine, and movie night. If you have kids you must send them off somewhere else at this point, but if you have dogs then you don't have to do anything.  If you don't have friends then open the oven every few minutes and have a conversation with the butternut squash about how wonderful it will be to have it all to yourself and.....OK, by now it has been an hour and you can take the squash and garlic out of the oven.  If you don't mind searing hot squash on your hands then don't let it cool for a few minutes.  Get out a soup pot and a food processor.  Puree the squash along with the liquid left in the pan, garlic (just remove each little clove from the little skin pouch and toss 'em in), and onion all together - and don't worry if you still have a few chunks of squash in your puree - it is good that way!!  Place the pureed mixture in the soup pot along with the chicken stock and butter and bring it up to medium heat.  Add about 1-2 tbsp cumin, 1 tbsp chili powder, 1 tbsp cayenne (less if you don't like so much kick) and salt and pepper it all to taste.  Let it simmer for as long as you like and serve with a dollop or two of sour cream with some chopped green onion - wipe the drool off your keyboard now.  Enjoy!!

As always, gluten free


Sunday, January 30, 2011

Cooking at Mom and Dad's House - a three course in the oven night...

My parents have done so much for me my entire life.  They stuck with me through the thick and the thin, and they still help me out no matter what - it's what family is all about.  I think the least I can do is prepare dinner once in a while.  I believe that if it wasn't for my mom desperately researching to find out what it was in my environment that was making me sick, stupid, and sad that I myself would never have become so interested in food, and what it does to our bodies good or bad.  Through the years I have really developed a love for food, and also a real passion for how food can heal or kill.  Just maybe I can partially repay my parents love by helping them to be healthy and to age gracefully through food, so that one day they may happily grow old without surrendering the last quarter of their life to detrimental illnesses that so often incapacitate the mind and the body.  So tonight represents one meal in that quest - roasted artichoke hearts, mushrooms, onion, and cauliflower, egg souffle with green onions and cilantro served with salsa, a nice salad, and finally (because I believe that my parents secretly cannot eat a dinner without having some sort of dessert - I will have to break them of this) baked apples and raisins with honey and pecans.  Sound good?  Yeah, it was.  Let's start with the roasted veggies:
Ingredients:
2 cans artichoke hearts quartered
1 large head of organic cauliflower (chop off the florets)
1 large pack of baby Portobella mushrooms
1/2 large white onion or 1 small sliced
Dried basil and oregano
6 cloves garlic whole but crushed with a knife blade just to let oils out
Butter
Lemon Juice 
Parmesan cheese
Salt and Pepper 
Of course - a little cayenne!!


Preparation:
Let's be serious people - if this isn't the easiest but best tasting veggie dish ever then you don't like food - period.  Preheat the oven to 350.  Butter a large baking dish, throw the artichoke hearts, mushrooms, cauliflower, garlic cloves, and onions in the dish.  Sprinkle about 1 tbsp basil and 1 tbsp oregano all over it, hit it with a little lemon juice, 2-3 pinches of salt, pepper it a little and don't forget a couple pinches of cayenne, and lastly as if this sentence wasn't long enough already, pour about 1/3 cup melted butter all over it.  Now mix it all up so that all of the ingredients get a coat of everything, pack it down a little bit and pop it in the oven for about 45 minutes.  When it comes out, grate a little bit of fresh Parmesan cheese on top and that's it, and it is the best part of this meal - delicious!!


Now for the egg souffle.  This thing is light and fluffy and full of eggy tastiness with a little oniony bite.  I served it with some salsa on the side, but it really didn't even need it.  You will need:
Ingredients:
10 eggs, whites separated from yolks to start (you will use both so don't discard anything - except the shell)
1.5 cups green onions chopped
1/4 cup chopped cilantro
Butter

Preparation: 
This is so easy.  The oven is already on for the roasted veggies.  With a beater, whisk the egg whites until they get very thick and creamy - like a stiff foam.  Beat the yolks and add a pinch of salt, green onions, and cilantro to them.  Butter an oven safe, deep dish pan like a large cast iron skillet.  Mix the yolks back in with the whites on low speed with the beaters.  Pour the mixture in the pan and stick her in the oven - just make sure and try to distribute the onions and cilantro evenly.  That will be done when the top turns a dark golden brown - about 30 minutes.  Serve it like it is or with some salsa!

I'll leave the salad ingredients and prep. to you guys.  Let's get it on with some baked apples.

Ingredients:
3 Braeburn apples (cut in to boats, triangles? You know.)
1/4 cup melted butter
1/4 cup raw honey
1/2 cup raisins
1 cup pecans 

Preparation:
Place your apples in a baking dish, sprinkle on the raisins and pecans, pour the butter over this, drizzle on the honey, mix it all up really well and bake it in the oven until the apples reach your desired softness - some like 'em crisp and some like 'em soft.  I actually took mine out after about 10 minutes and stirred it all up again just to make sure the apples on top didn't dry out, and then I put 'em back in for a while.  That's it, another three courser and all in the oven and all stupid simple.  Enjoy!!


As always, gluten free


Thursday, January 27, 2011

Today's Lunch

Today we have: Leftover lentil veggie soup, leftover tuna green bean casserole, wild arugula salad with a little homemade vinaigrette on the side, and some celery with peanut butter (peanuts and salt).

My vinaigrette is high quality extra virgin olive oil, apple cider vinegar, horseradish mustard, lemon juice, basil, smidge of salt. 

As always, gluten free.

Wednesday, January 26, 2011

Ridiculous Good Quick and Easy Casserole!!


If you're dedicated to not eating fast food and take-out, and you cook most of your meals, then you probably know what it's like to come home after a long day and look in the cabinets and say, "What in the world am I gonna make tonight?"  It's one of those nights where all planning has escaped us and we're left, tempted to just call in something when that little voice says "NO!"  So you start sifting through all of the ingredients, trying to put a picture together of what dinner is going to consist of...yeah this looks good, that might work, don't want that really, ooooooh yeah I could do that!  That is what is going through your mind as you concoct the masterpiece that you will either regret later, or say dang, that was truly awesome.  Truly awesome is what happened the night Mandy and I were like - hell what about green beans and maybe ummmm Tuna, and well....you get the picture.  This one came out so slammin' that I'm pretty sure Mandy said it was her favorite at that time (now it's the soup I just posted).  I have finally gotten around to making it again with a few tweaks...so here it is, a true throw it together treasure...tuna casserole with homemade cream of mushroom and green beans!!  That's a mouthful that you won't regret.  You will need...

Ingredients:
24 oz. canned wild tuna - light or dark - I use dark
1 qt. jar green beans - mine were from my garden this past summer - equivalent canned or frozen is fine
3 cups homemade cream of mushroom or equivalent, but you will be hard pressed to find one that doesn't have 25 other stupid ingredients in it - MAKE YOUR OWN!! I will include that recipe at the end.
1.5 cups fresh mushrooms
1/2 cup sour cream
1.5 cups shredded grass fed cheddar cheese and extra for top of casserole
2 eggs beaten well
Salt and cayenne pepper 
Butter to grease pan

Tuesday, January 25, 2011

Rainy nights make the best soups - and my wife makes the best cornbread...ever


It all starts with a really cold and rainy evening.  Just the sound of the rain droplets blowing against the windows allows a little glimpse of how miserable you would be if you ventured out the door, but there you are, inside and warm - a little bit of delightful jazz in the background, dogs curled up in no anticipation of having to venture out in the cold either.  Mandy knows this feeling....it's soup time.  I owe a little credit where credit is due for this recipe.  I was perusing through this old plastic ring bound, vegetarian cookbook that my mom has handed down to me, and you know I love me some lentils, so I stopped on this lentil soup.  The book is The Meatless Gourmet Favorite Recipes From Around the World by Bobbie Hinman.  The recipe is Lentil Vegetable Soup and it is on page 43 if you ever find yourself holding a copy (I doubt it).  I will admit, even though I will readily go out on a limb, I wasn't so sure about this recipe - but Mandy said it would be fine and that was all I needed (basically her acknowledging that if it sucked it was OK).  I changed the recipe up a little bit for my tastes and preferences - I didn't keep this one vegetarian, yet it could easily be modified.  You have to try this one out - it is a hardy little soup that really warms you up, but leaves you feeling fabulous .  You will need the following:
Ingredients:
3 tbsp organic butter
1 large white onion chopped
2 cups chopped celery
1 cup chopped carrots
5 cloves rough chopped garlic
4 cups shredded cabbage
1 large head of Lacinato kale - YES!! chopped
about 5-6 red skinned potatoes chopped not peeled!!
2 cups chicken broth - we made homemade broth from free range, organic chicken drumsticks
6 cups water
1 large can crushed tomatoes
2-3 tbsp tomato paste concentrate
2 cups red lentils soaked for 8 hours in water and then drained - soaking is not necessary, but there is evidence to show that all legumes and grains contain phytic acid which can bind several nutrients during digestion - soaking neutralizes this acid.
1/2 cup rough chopped cilantro - I must admit - the cilantro sets this soup off

BTW - we have been trying to use all organic veggies, and free range meat and dairy products.  There was a time when I thought this was unnecessary and very expensive - but I would encourage anyone to do some research, one, so that you can see that there is a fundamental difference in organic products vs. commercially produced that may well be a large part of the frequency of disease in our culture today, and mostly, two, to understand that much of the organic produce and free range meat and dairy products are part of a sustainable movement for this country that will - if allowed - improve this world not just health wise, but in unlimited ways.  The quality of your food depends on the quality of your ingredients, and by quality I don't mean just taste - I mean quality and type of nutrients that your little body craves, but that our current commercial food conditions exclude.  Plus, not that these items cost that much more than normal, but the more you spend, the more you will savor your food - and truly enjoy it while taking more time to eat it, and therefore possibly skipping the extra portion that you might otherwise eat!  Maybe, maybe not right?  On to the prep - sorry about that...


Preparation:
Get all of your veggies all chopped and shredded and all that mess.  Get a large stock pot (12qt is good) and saute the onion, garlic, celery, and carrots in the butter until soft.  The butter can be replaced with high quality olive oil.  Make sure and hit these veggies with a couple pinches of salt during sauteing.  Go ahead and add your chopped potatoes at this point and roll them around with the veggies for a couple minutes.  After the veggies get soft and the taters are in there,  add the chicken stock (which could be replaced with veggie stock) and the water.  Salting a pinch after each addition of ingredients keeps you up to speed on salt and allows the salt to really get in there and penetrate each level of the soup.  Otherwise you will be stuck adding what you think is enormous amounts of salt in the end, so just a pinch or two after each addition should suffice because you can adjust in the end.  Now add your crushed tomatoes and tomato paste.  Let this return to heat, and now add the rest of your ingredients - cabbage, kale, LENTILS, and cilantro.  Get this all stirred up well, bring to a boil and then reduce heat, put a lid on it and let it simmer for an hour or so.  After this you can do a taste test and add salt or pepper if you like - whatever you think it needs - you're done with the soup, and now we can move on to what you really care about - yeah that's right, Russell cooks his ass off and all any of you care about is the cornbread that Mandy made - most of you probably won't even read this because you already scrolled down to see the cornbread - fine - I don't blame you cause it rocks!!


While the soup is simmering - get your cornbread ingredients together - you will need:
Ingredients:
2 cups Bob's Red Mill organic med. grind cornmeal
1 egg beaten
1 1/2 cups raw buttermilk
1/4 cup melted organic butter
1 1/2 cups organic cheddar cheese
1/2 tsp salt
4 tsp baking powder (aluminum free, no GMO )
Preparation:
Mix all ingredients in a bowl
Melt about 2 tbsp butter in an iron skillet in the oven at 425 degrees
Pour mixture in the skillet and bake at 425 until toothpick comes out clean and cornbread is golden brown - Enjoy!!


Now if that's not enough reason to gladly welcome any rainy, cold night then you just must not like soup - and that is a shame - but the cornbread?  Yeah, I thought so...bring on the rain!  One more thing - check out the cilantro I was able to decorate Mandy's omelet with this morning - that's just cool!


Thursday, January 20, 2011

All Kinds of Splurging - All on a Wednesday Night - Three Course, Gluten Free Meal

I am pretty poor, OK I'm really poor.  Business isn't great or even good, I am in school, and I just got the powerbill for the store today - holy crap.  However, sometimes you just need a good meal to get you back in to the right spirits so that you can begin to conquer the endless towering mountain called life.  After countless nights of eating on a budget and trying to make everything last, I needed one of those good meals last night.  I might not make it to school tomorrow beccause my gas money is gone, but I feel better.  So here it is - seared tuna steak with homemade hot mayo sauce and cabbage, nice baby green salad with dijon mustard vinaigrette, and spaghetti with clam sauce!!  I know, I know pasta is not on our menu, except for this night - and maybe again in another few months.  Anyway, all of this was really simple to make - just do better than me and don't over-sear the tuna, and get a really good sharp knife so that the tuna doesn't look like you cut it with a mini chainsaw. For the tuna, you will need about a half pound wild-caught tuna steak, salt, pepper, a grill or iron skillet, one organic or pasteurized in shell egg, a few tablespoons of expeller pressed canola oil, smidge of salt, hot sauce, and cayenne pepper.  I prefer the iron skillet for searing the tuna - so get it hot, between med. and high heat. While that is getting hot, rub salt and pepper all over the sides of the tuna steak until it has a nice lite coat on it.  Once the skillet is up to temp, sear each side of the steak for about 20-30 seconds and then take it off the heat and set it off to the side to cool.  Get a small bowl and place just the yolk of your egg in the bowl and whisk it up pretty good.  Add a small amount of canola and start whisking until it starts to get a little thicker.  Keep adding the oil in very small amounts, whisking feriously in between until the mayo gets a nice smoooth texture.  Add the smidge of salt, a few squirts of hot sauce, a little cayenne and whisk it all together and do your taste test.  Adjust and you are done.  You can keep that on the side or drizzle it all over your seared tuna and cabbage.  Next....we'll knock out the spaghetti with clam sauce.
I probably should have said this first, but you need to get this sauce going before you ever even think about the tuna.  Anyway, for the sauce you will need:
Ingredients:
1 box Pomi brand strained tomatoes
1 box Pomi brand chopped tomatoes
3 small cans of chopped clams - make sure it's just clams, water, and salt
1/2 small package of baby portobella mushrooms
1 sm white onion chopped fine
1 sm green bell pepper chopped fine
4-5 cloves garlic minced
Onion and Garlic powder
Oregano
Salt and Pepper
Butter

For the sauce, first saute the onions, bell pepper, and mushrooms in about 3 tbs butter on med. heat.  Be careful not to burn the butter.  When this mix gets soft, throw in the garlic and stir making sure the garlic doesn't burn.  In other words just stir it all around together for about 20-30 seconds so the garlic goodness can get incorporated without burning.  Add your two boxes of tomato.  I say boxes because Pomi's tomatoes are boxed, and they only contain tomatoes.  You may use whatever you want.  Add some salt and pepper - I always add a little cayenne to clam sauce to give it a special kick.  Add about 1 tbsp garlic powder and 1 tbsp onion powder.  The powders really give the sauce some spicy depth instead of tasting like just straight up tomatoes.  Get this all mixed together well, do a taste test, do a little adjustment and then put a lid on it and turn it on lower heat and let it simmer for a while.  Mandy hates Italian seasoning like Oregano, so I didn't put it in.  I would definitely recommend it, so you can put about 1-2 Tbsp in at this time depending on how much you like it.  Check on the sauce every now and then, doing taste tests and making sure the sauce is happy.  While the sauce is simmering away, it is a perfect time to cook our gluten free pasta.  We went with brown rice spaghetti.  Just get a pot of water going with a little pat of butter and about 1-2 tbsp salt - that's right - it really does make a difference in the noodles when you salt the water well.  Don't worry - you are not going to drink the water - you're just going to eat the pasta.  Get the water boiling and get that pasta in there.  Try not to make the pasta feel guilty for making you gain weight - after all, someone worked hard to make all of that brown rice in to noodles.  After our noodles were finished, we dumped our finished sauce in a large bowl and then tossed the pasta in with the sauce and mixed it all around - perfection!  We just made a simple baby green salad with a simple little dijon mustard vinaigrette.  The dressing consists of cold pressed extra virgin olive oil, a bit of raw apple cider vinegar, organic dijon mustard, lemon juice, and pepper.  Just mix it all up and adjust it to your taste.  Here is the salad.

 I hope you try this meal - it was great.  Don't forget to take a look at today's lunch! Enjoy!!
I am on a quest to reduce my use of vegetable oils in my diet, even though I already use very minimal amounts.  So today, I made a tangy butter and vinegar sauce for my little salad.  It tasted really good, but we will have to see how it holds up after a half a day in the Bento.  I sauteed a few baby portobellas in butter, got a little turkey and finally some of that leftover quiche with my pesto. 

Tuesday, January 18, 2011

Another Lunch Idea - Sauteed Curry Spinach and Onions and Spicy Slaw

Today's lunch is awesome - I just finished eating it.  This morning I sauteed fresh spinach with some onions.  I liberally hit it with some curry, cayenne pepper, a little oregano, salt, and turmeric.  At the last minute, I added one clove of rough chopped garlic and then topped it off with some walnuts.  It smelled so great coming out of the Bento that I almost ate it cold - but I found a nearby microwave instead.  Also, something I have been perfecting here for the last couple of weeks is spicy broccoli slaw.  We get that organic broccoli slaw mix in the package, and it only takes a minute to make a little spicy sauce to top it with.  I mix olive or canola oil with a little bit of raw apple cider vinegar, a half a pinch of salt, a squirt of organic Dijon mustard, lemon juice and cayenne pepper - stir it all up and mix the slaw in with it.  It is so tangy and fresh even after being in the Bento half the day.  Mom baked an antibiotic free, veggie fed turkey and she let me have some.  I mixed the turkey with the curry spinach and onions and it was fantastic.  I threw in some broccoli to complete the meal.  Try it out and let me know what you think.  Enjoy!!

Monday, January 17, 2011

What's for Breakfast?

I have been attempting to make omellettes now since I was about 14 years old.  Emphasis here is on the word attempting.  Sometimes we assume something so simple should be really self explanatory to prepare, and we then totally ignore alternate methods as to how to do something the right way.  Of course I understand that there really is no "right way" to do one thing, unless of course that one way is far superior to any other method.  This is the case with the omelette.  I would always beat the eggs, add a little milk, pour it in the pan and then try to get all of my ingredients on to the egg as it cooked, and then somehow fold it all up.  Or, I would just mix all of the filling up in the egg mixture and pour it in the pan, let it cook a bit and then fold it all up or flip it over.  I became very discouraged lately, because I just seemed to suck at making omelettes.  Usually they all ended up as a scrambled egg concoction of what started as an already failing attempt at a beautiful omelette, and usually the egg was way overdone and brown.  Along came Bobby Flay, no not to my house, but there he was on TV one night throwin' it down omelette style and I knew that I had to check this out.  Long story short, I was missing the whole point, and now after several mornings of pure omelette joy, I am an omelette professional, flip and all.  Here is my breakfast this morning - a fabulous southwestern omelette.
OK, first you need to get all of your ingredients out and ready.  You will need:
Ingredients:
2 organic, free range eggs
About a palm full of frozen fajita veggie mix. (Peppers and onions)
About a palm full of free range white cheddar cheese (Trader Joe's)
About a palm full of frozen spinach - or 2 cups fresh to cook down with frozen mix
Sour cream
Mild Salsa
Salt
Cayenne Pepper
Extra virgin olive oil

To start, get all of your veggies out and saute them in just a little oil and a pinch of salt on medium heat until they get soft.  After they are soft, take them out of the pan and put them on a plate to the side.  Clean the pan out well and dry it. 

Alright, as you can see I have everything out and ready to go.  Sour cream with a spoon, salsa with a spoon, cayenne is out, salt is out, veggies and cheese are on a plate to the left and a little oil in the pan on medium heat getting hot and ready for some eggie good stuff.  So, take your two eggs and beat them up pretty bad until the mixture is completely yellow and homogeneous.  You want to incorporate a lot of air in to the eggs while beating them, so don't be shy.  This way your omelette will be nice and fluffy.  When the eggs are beat and the pan is hot, pour the eggs in the pan and get the spatula ready.  As soon as the eggs start to cook the slightest bit, start swirling the mixture around gently while scraping it from the sides back in to itself.  You can make holes, it's OK, just swirl the wet stuff on top in to the holes.  Do this until you have a sort of circle of scrambled eggs held together by the liquid.  Take the spatula and run it around the edges and towards the middle until you are sure that the whole thing is loose and moves around in the pan when you grab the handle and shake it.  It should look something like this....

Let this cook a bit, shaking it all the while until it slides around easily.  You can flip the edge up with a spatula to make sure the other side isn't getting to done.  It should only take about 10 more seconds after you get it loose.  Now it's time to get your flip on.  Of course if you are a conservative person and don't like the idea of your omelette traveling through the air in your kitchen for a brief period of time then you can go through the painstaking steps to try and flip your eggs over with a spatula - good luck with that.  For everyone else, get your shaking rhythm going back and forth and when you feel comfortable throw the pan forward with some good force and then drop it down.  With a little practice the egg should flip right over and fall back in the pan on the other side.  I realize this will be easier for some than for others - I have played tennis my whole life and I feel like I may have a slight advantage when it comes to flipping omelettes considering I nailed it the first time.  Anyway, enough gloating - give it time and you will have the flip down.  So now that you are looking at the other side of the egg, start putting your filling on one side immediately.  You don't want the egg to be too done so this part needs to be done as quickly as possible.  Spoon on the salsa and sour cream over the peppers and cheese, sprinkle a pinch of salt and cayenne on the mixture,  and use the spatula to gently fold one side over the filling and slide the whole thing out of the pan on to your plate.  The really cool thing is now you can use a towel to shape the omelette.  Just place the towel over the omelette and roll one side over the other and mold it like you want it.  When you take the towel away, you are left with a perfect little omelette - outstanding!!


This breakfast has lots of veggies, a lot of good fats including a generous portion of omega 3s in the free range organic eggs and in the spinach, good protein - and it has no sugar, no refined carbohydrates, no easily digestible starches, no preservatives....I could go on, but in the end this breakfast will keep you feeling full for half the day and it is the best omelette ever.  Enjoy!!!

By the way, omelette can be spelled like that or like this...omelet.  Who knew?

Sunday, January 16, 2011

Broccoli and Spinach Quiche with Homemade Pesto

OK, so this is my second quiche in the span of a couple of months - can you tell that I like quiche?  There aren't a whole lot of simpler, more satisfying gluten free dishes than a crust less quiche, and this one is drizzled with a little homemade pesto sauce.  I just finished reading The Queen of Fats by Susan Allport, and with the sheer amount of green leafy veggies, free range eggs, walnuts, high quality canola oil, and free range cheese in this one, hopefully this is a meal that will at least replace a few of my omega 6 fats in my cell membranes with some omega 3s.  That may be a simple explanation, but the implications in this book cannot be ignored.  Although omega 3 and omega 6 fatty acids are both essential to our bodies, it is evident that we have grown deficient in omega 3 fats because of the lack of green leafy veggies, emphasis on overall polyunsaturated fats instead of omega 3s, processed foods that inevitably reduce omega 3s for shelf life, and sadly the incorporation of too many omega 6 fatty acids in to our food animals tissues because of the improper diets fed to them and their poor living conditions.  So let's start doing something about that and get back to the quiche. 
Ingredients:
5 cage free vegetarian fed, or free range eggs.
1 cup milk of your choice (I use local raw milk)
1 cup chopped broccoli (frozen thawed)
2 cups fresh organic spinach chopped rough
1 cup fresh Portobella mushroom diced
1/2 white onion chopped
1 cup free range, grass fed white cheddar cheese (Trader Joe's) hand shredded from the block

Pesto Sauce
2 cups organic fresh basil leaves chopped rough
1/2 cup walnuts
1 cup Parmesan cheese grated from block
1-2 cloves garlic
Pinch of salt
Canola Oil (expeller pressed, no solvents)
Extra Virgin Olive Oil

For the quiche, get all of your veggies chopped and cheese grated.  Preheat the oven to 400 degrees.  Beat the eggs well so that the whites and yolks are homogeneous and then whisk in the milk.  (You can use heavy cream in place of milk)  Butter a pie dish with some unsalted organic butter.  Put all of your veggies and cheese in the pie pan and sprinkle a pinch of salt on top.  Pour the egg mixture over the veggies and mix it all up well with a fork. Make sure the veggies are dispersed evenly throughout the mixture and pop that bad boy in the oven for about 30-40 minutes or until the top of the quiche gets nice and brown.

While the quiche is in the oven.  Roughly chop the basil leaves and put them in a food processor.  Add walnuts, garlic clove, pinch of salt, and Parmesan cheese.  A little squirt of lemon juice wouldn't hurt either.  Turn on the food processor and after everything is chopped fine, start dribbling olive oil in to the mixture until the consistency is liquid, but not too runny.Finish the mixture off with some canola oil.  Experiment with the pesto.  This sauce is going to liven up your quiche and make it irresistible, so taste the pesto at every step and make sure it is tasting the way you would eat it.  There are no rules except your own rules when it comes to the food you are cooking, so don't be afraid to add a little more cheese, a little more salt, a little less walnut, or whatever until you like the taste of your pesto sauce.  After you get the pesto just right, the quiche should be about done.  Take her out of the oven, drizzle (or plop) some pesto on top and you are done.  Store your pesto and quiche in the fridge (unlike Mandy who left our quiche out on the counter top all night long) for the next day and maybe even the next day if you don't eat it all before then.  Enjoy!!